Measuring Arm EDGE 2,7 mt. Operating diameter + laser head V6 HD blu light
Possible of scanning to verify immediatly any points out of Tolerance
Customer report of the final measurement made

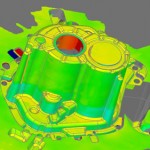
The immediate result is a color map where the CAD file is coloredgreen in the parts where the measured points within tolerance in design. While theblue / blue indicates a lack of material, or a misalignment thatIt implies a negative error, on the other hand a yellow / red color indicates an excess of material or a misalignment with positive error.
This simple view lets you instantly identify any problems after a few minutes of testing.
You can also apply simple labels that show the explicit numerical error by Color:

All these images are automatically saved for the final report.


